Find out how you can install & configure TrueNAS (formerly known as FreeNAS) within a VPS Hosting server. TrueNAS is a very popular open source network attached storage (NAS) software. You can easily turn your VPS server into a cloud NAS with TrueNAS.
Summary
- You already have a Storage VPS
- Install TrueNAS
- Configure TrueNAS
Installing TrueNAS
To install TrueNAS, simply follow these steps:
- First, login to your Client Area or VPS Control Panel.
- Next, mount TrueNAS ISO image and reboot your VPS
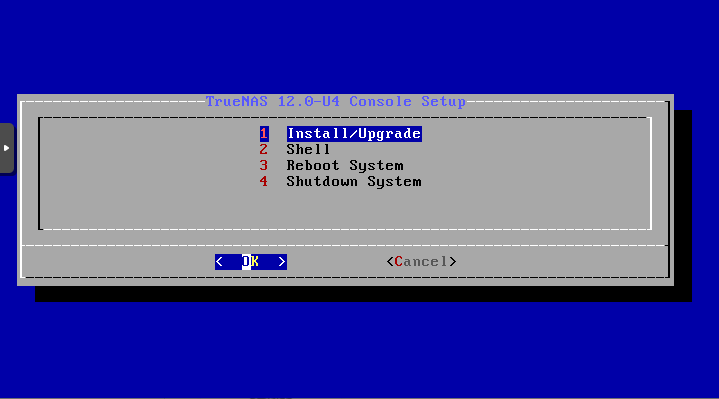
- You will now see the following installation screen via noVNC (or any VNC viewer). Press Enter.

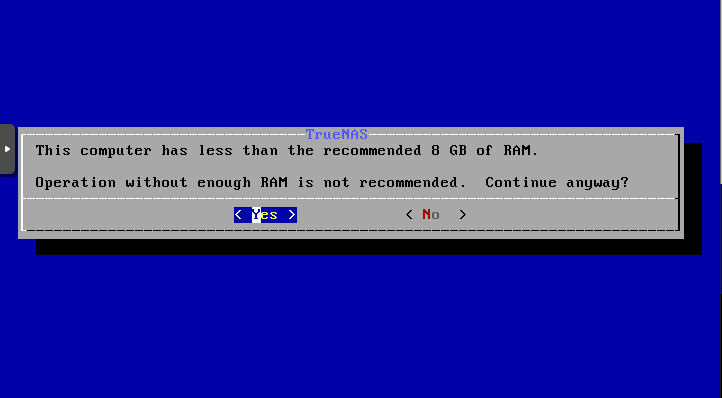
- You will now see the following alert if your VPS has lesser than 8GB RAM. Select OK and press Enter.

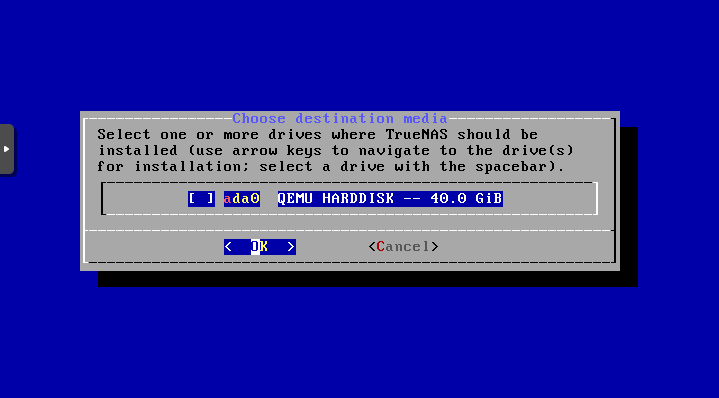
- Then, you should press Spacebar once and press Enter again to proceed with the selection of destination media. Your VPS is likely to have only a single storage. Press Enter once again to confirm that all data within the destination media will be formatted.

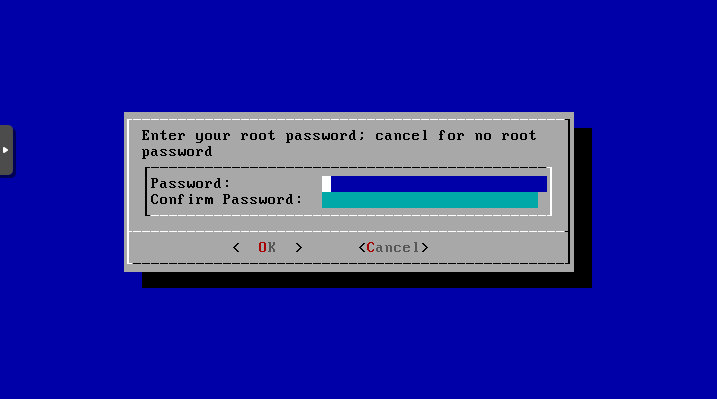
- Next, use strong & secure password to protect your TrueNAS installation.

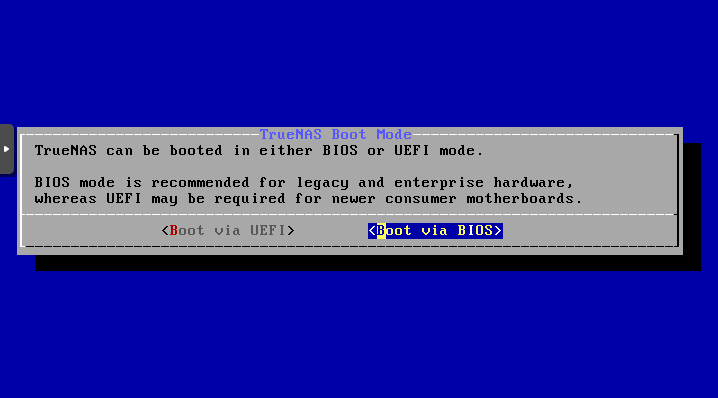
- Press Enter to confirm booting TrueNAS via Bios.

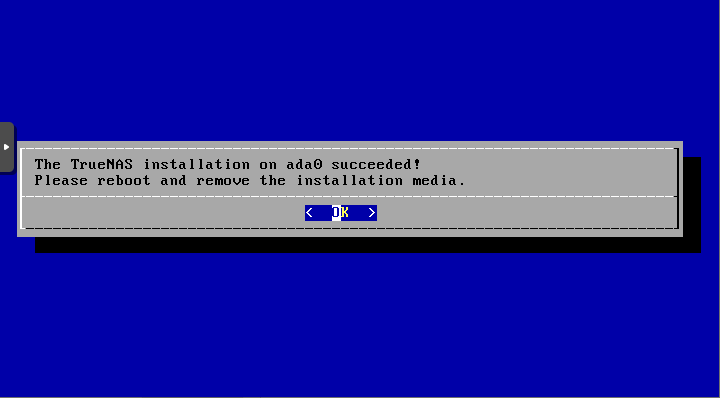
- You can now sit back and relax while the installation takes place. You will see the following screen once it is done. Press Enter to proceed next.

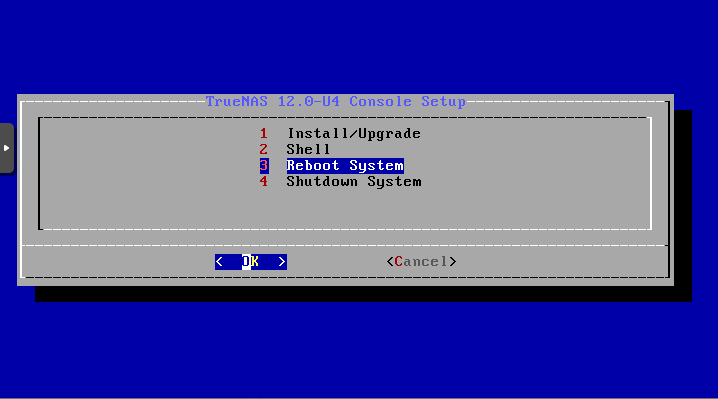
- Select Reboot System and press Enter.

Configuring TrueNAS
- Proceed to the web interface of TrueNAS on your internet browser.
- You will now create a storage pool by going to Storage -> Pools -> ADD.
- Next, select Create New Pool -> Create Pool and name your Storage Pool.
- Finally, enable sharing on TrueNAS. TrueNAS supports AFP, iSCSI, NFS, WebDAV, SMB protocols. Select Sharing and the type of share that you want to create and click ADD in the upper right corner.
- When prompted, simply select the Storage Pool you added.
- You can now start using TrueNAS.
Conclusions
This article shows how you can install & configure TrueNAS/FreeNAS on your VPS Hosting. Be sure to use a large storage VPS so you have sufficient space for your files & data!